Fundamentals of Digital Forensics
3. Digital evidence acquisition procedures
3.1. Sterilisation procedure
The sterilisation procedures is intended to ensure that our target device is ready to receive the original information. Sterilisation aims to write all bits of our collection disk with the value 0 (zero), thus ensuring that no previous information is presente on it.
After sterilisation it is always necessary to validate, checking that the sterilisation has occured in the correct way. After this validation we can proceed with formatting the disk to an appropriate file system.
There is a lot of software that allows you to perform this procedures of sterilising a disk and formatting it to the desired file system. Here we will demonstrate the process using the tools present in most Linux distributions, lsblk,fdisk and dc3dd.
The first step is to identify the disc to be sterilized. It is very important that this identification is univocal and confirmed as many times as necessary. A sterilized disc cannot be recovered.
3.1.1. Device identification
The device identification is done through a series of commands. First of all it is necessary to determine which volumes installed on the computer to be used. A good practice is to use a computer with only the disk to be sterilized connected, starting the operating system from a liveCD or a USB stick. This reduces the possbility of errors in the identification of the disk:
$ lsblk | grep sd*
This command will list all the storage devices recognised by the operating system. All disks will be displayed as well as their size and partitions. This command only helps us to know what is the name of our disk in the computer.
In case of doubt we can still use the command (Figure 14)
fdisk -l /dev/sd*

Figure 14 – identification of the device
This command gives us more information about the desired disk.
3.1.2. Sterilisation of the target disk
The sterilization process is nothing more than writing the whole disk with the value 0 (zero), that is, force all the bits of the hard disk to acquire the value zero.
For this task you can use tools like Live-CD DBAN (www.dban.org) or in Windows the Eraser (eraser.heidi.ie).
In Linux wen can use the commands (Figure 15)
dc3dd wipe=/dev/sdd verb=on corruptoutput=on
or
dcfldd if=/dev/zero of=/dev/sdb bs=8k conv=noerror,sync
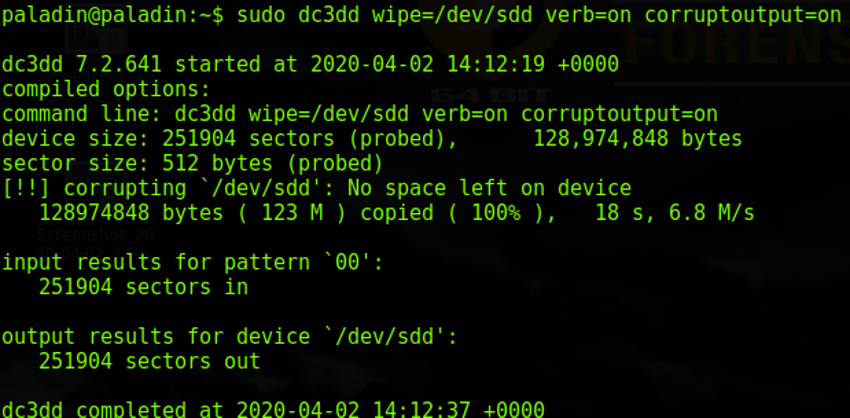
Figure 15 – Sterilisation of the target disk
This command performs a write of all the bits of a hard disk, so it will take longer the bigger the hard disk. In our example a device of only 123mb took 18 seconds to be written, however a hard disk of 1 TB, may take more than 8 hours. It is also important to note that depending on the hard disk technology, this time may be higher or lower, depending on its writing speed.
In Microsoft Windows, the sterilization of the destination disk, can be performed through the diskpart command.
Performing the identification of the destination disk by:
LIST DISK (device identification)
LIST VOLUME (volume identification)
SELECT DISK 1 (select the disk to be sterilised)
Performing the sterilisation (Figure 16)
CLEAN ALL
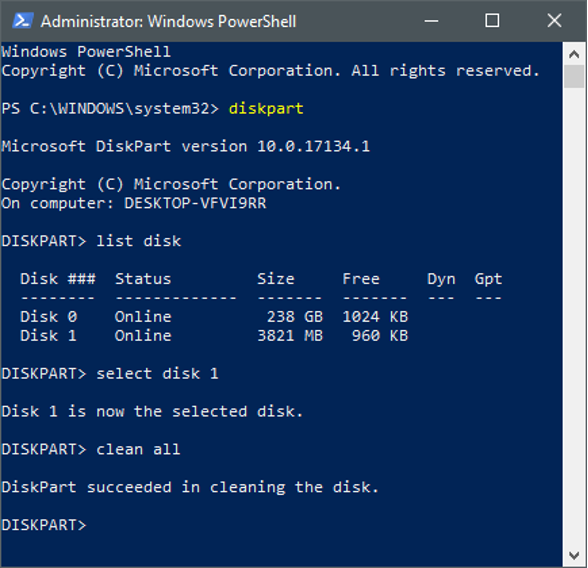
Figure 16 – Destination disk sterilisation under Windows
3.1.3. Verification of the Sterilisation
Finally, it is important to verify that the writing of the hard disk was effective, for this we execute the command:
cat /dev/sdb |od
If the write was successful, the output of the command will be 0000000, which indicates that the hard disk is written with zeros only (Figure 17).

Figure 17 – verification of the sterilisation
The “cat” command will display the device’s contents, while the “|od” argument will convert this content to octal base, so only zeros will be displayed when the sterilization was successful.
Apart from the procedures presented, there are other methods and different commands that can be used, such as displaying in hexadecimal format, or others.
3.1.4. Formatting
After the sterilisation, it is necessary to format the disk, enabling it to receive data.
This formatment can still be performed using Diskpart, as follows:
Creating the primary partition (Figure 18)

Figure 18 – Creation of the primary partition
NTFS formatting (Figure 19)
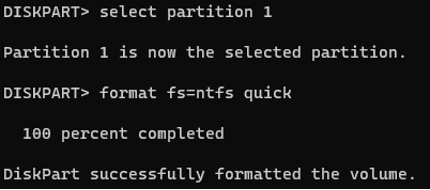
Figure 19 - Formatment
From the graphical environment, the Disk Management application can be used through the DISKMGMT.MSC command (Figure 20).
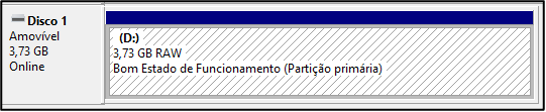
Figure 20 - Disk Management
Right-click on the desired disk and select “Format”, then indicate the name and the desired file system. Fast formatting can be selected, since the disk has been previously sterilized (Figure 21).
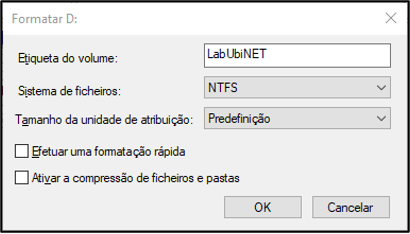
Figure 21 – Formatting using Disk Management